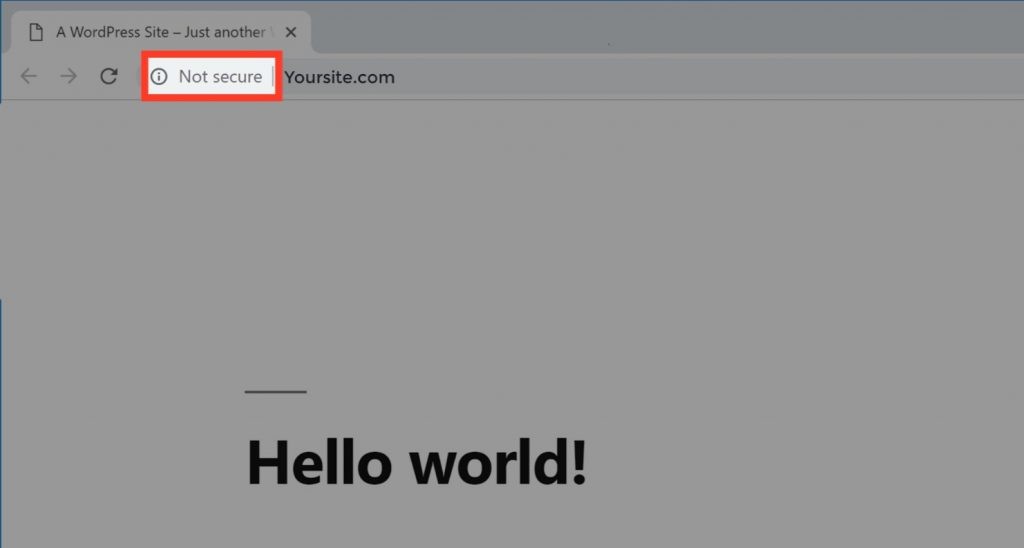
Do you get this “ Not secure” message on your website? It means that you do not have SSL
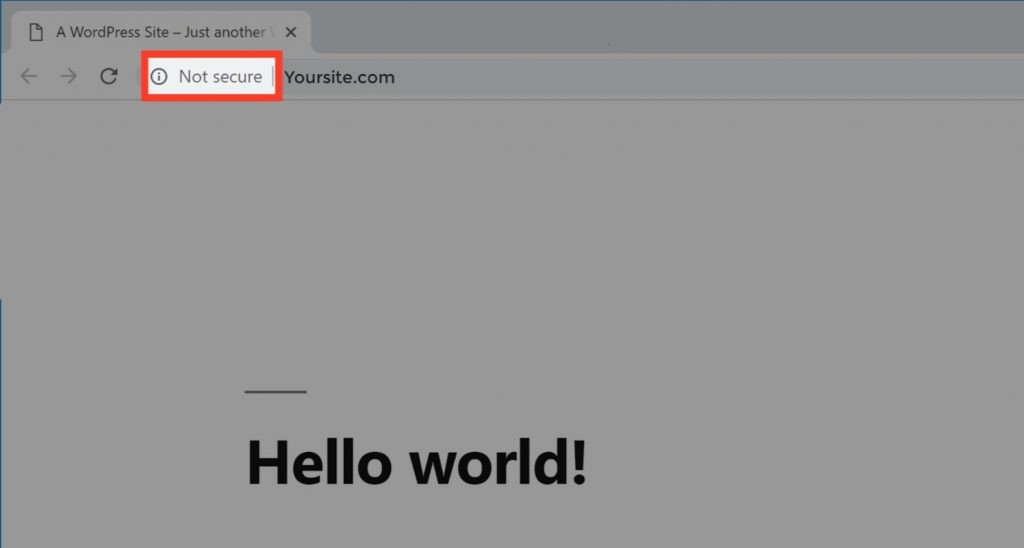
Now if you want to change this “Not secure” message into the secure lock symbol as shown in the image below, you need to get an SSL for your website.

So in this article we will show you how to get a free SSL for your WordPress website and set it up all by yourself easily.
Read: 25 Free WordPress Plugins to Make your Dream Website
What's in this guide?
So What is SSL?
SSL stands for Secure Sockets Layer, and it secures the data that goes from the user browser to the website they are visiting and vice versa, so when you have SSL on your site, it ensures that the data transferred between your website and your visitor is safe.
When your visitors see the lock symbol on your site, it will make your visitors trust your website.
So Let’s get started!
How to get a Free SSL for your WordPress Website?
We’re going to get the free SSL certificate, in just 5 steps
STEP 1: Create An Account On Cloudflare
Cloudflare is where we are going to get our free SSL
1. So go to cloudflare.com
2. And then click sign up.
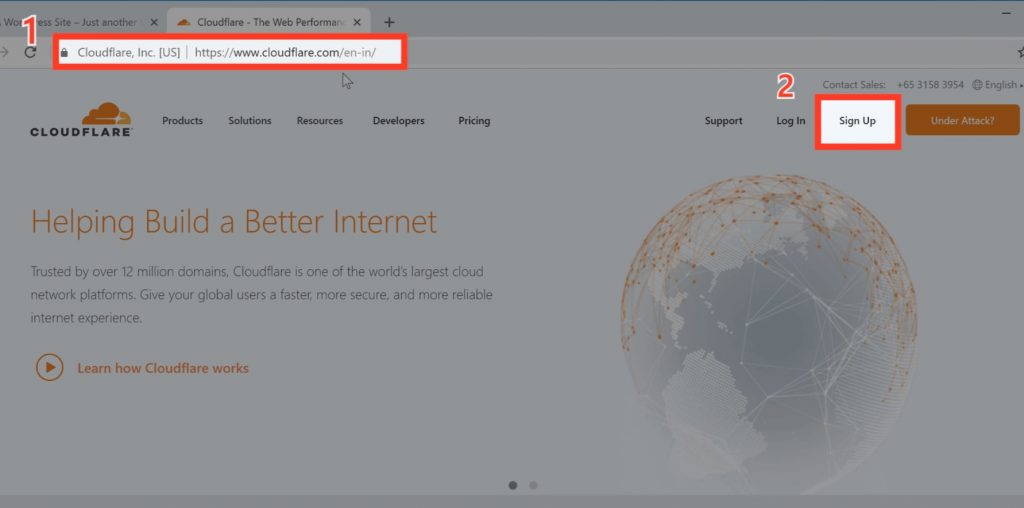
As soon as you click sign up, it will take you to the page where you can create the Cloudflare account Now
3. Enter your details and
4. Click create account
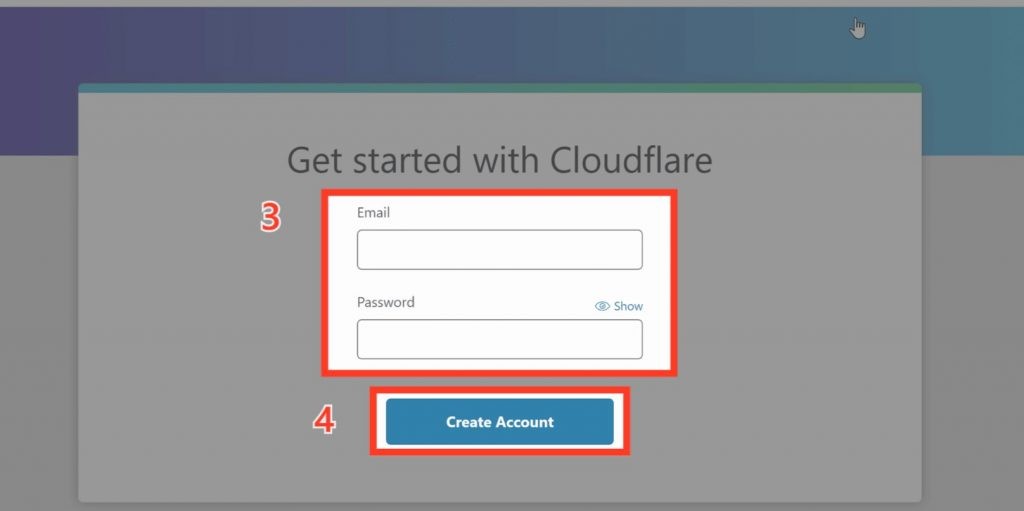
Your account will be created
STEP 2: Add your website to Cloudflare
To add your site to Cloudflare.
1. Enter your website URL and
2. Click add site
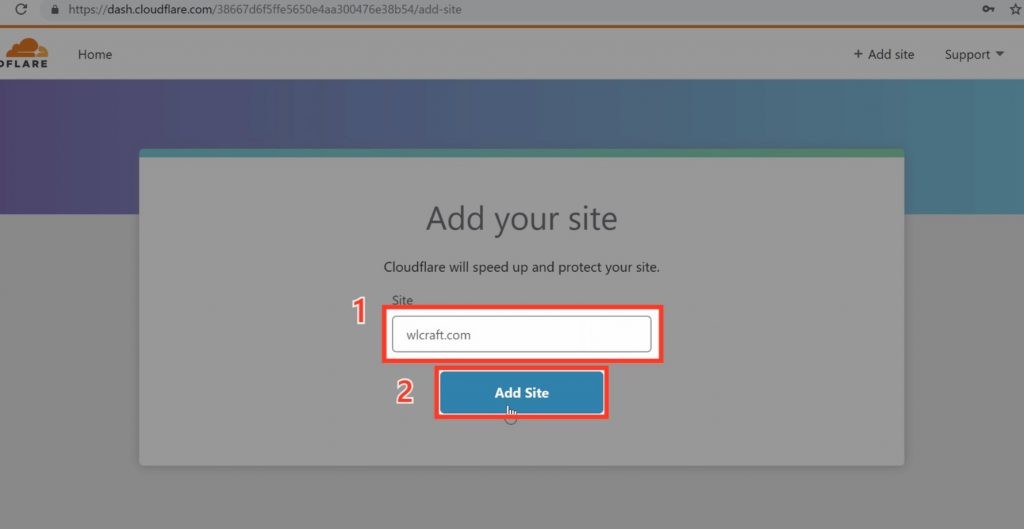
3. And then click Next to select a Cloudflare plan.
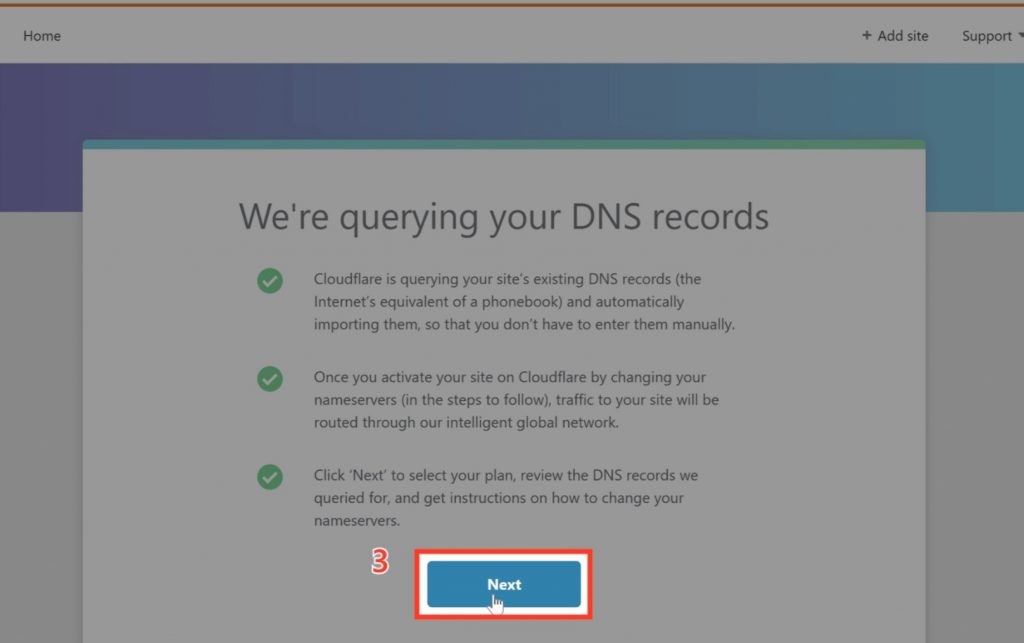
4. Now select the free plan and
5. Click Confirm
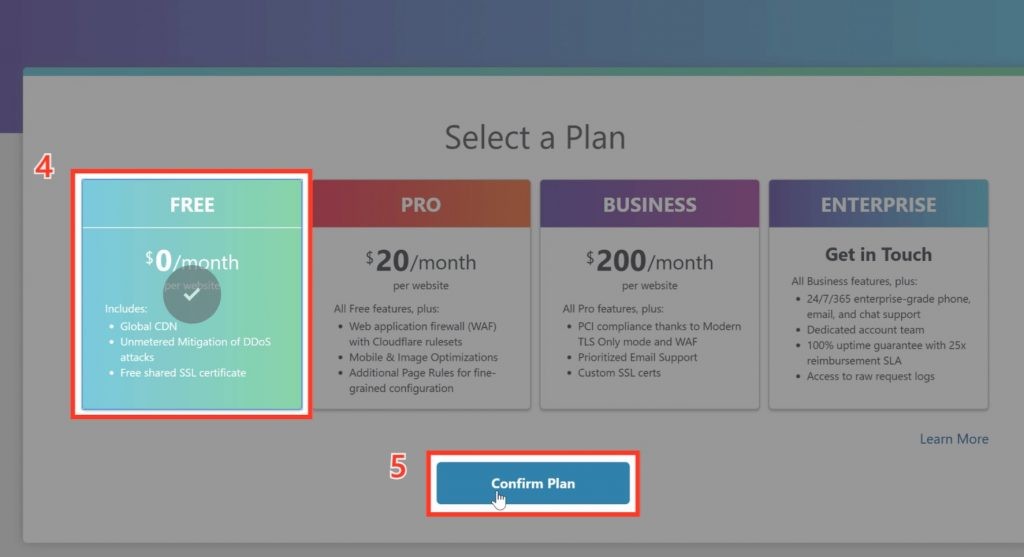
6. Next, it will take you to this page, here you just click Continue.
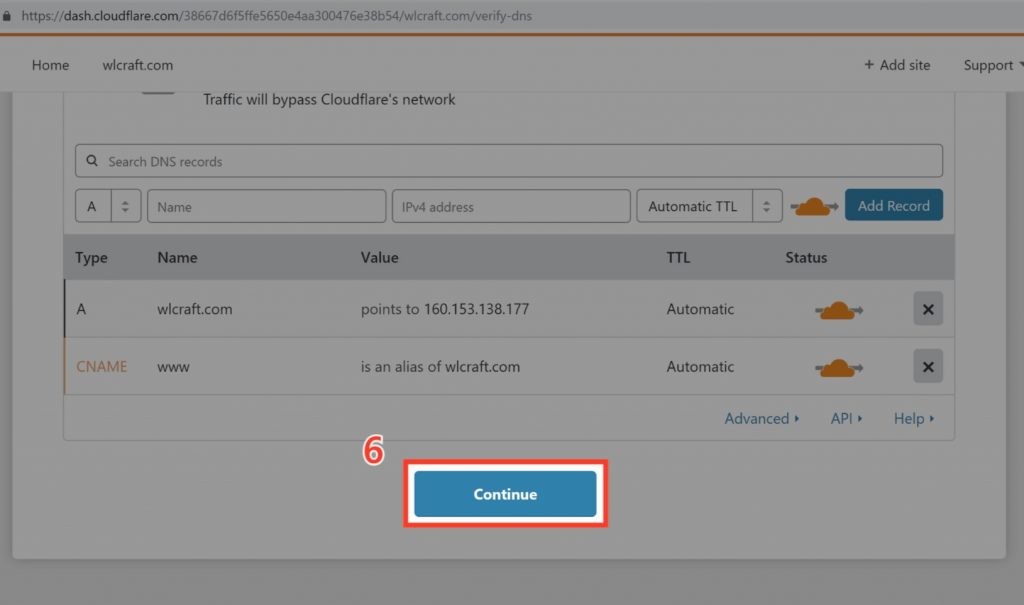
Now Your website will be added to Cloudflare.
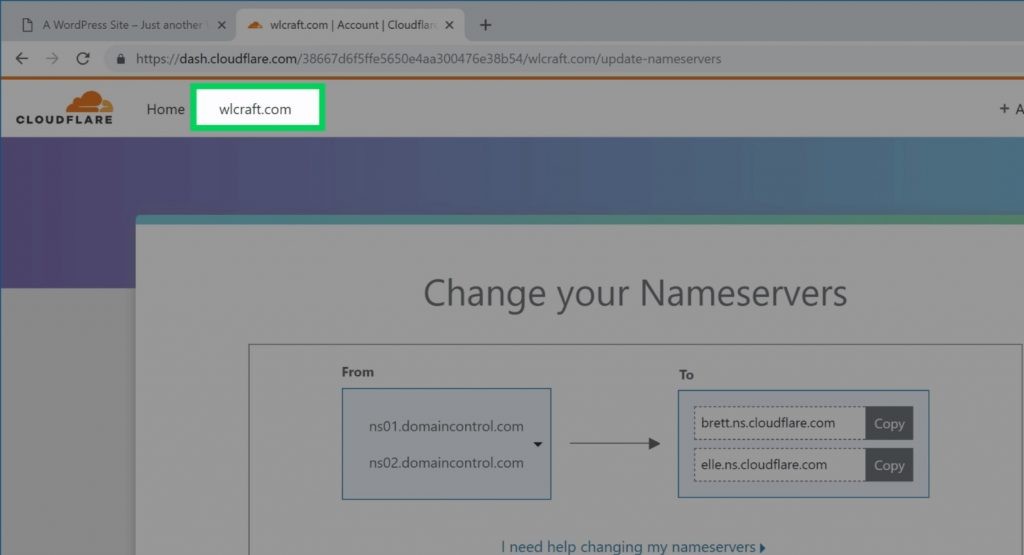
STEP 3: Change your nameservers
In order to connect Cloudflare to your domain, we need to add these nameservers as shown in the image to your domain. So to add these nameservers, you need to first, login to your domain provider’s website.
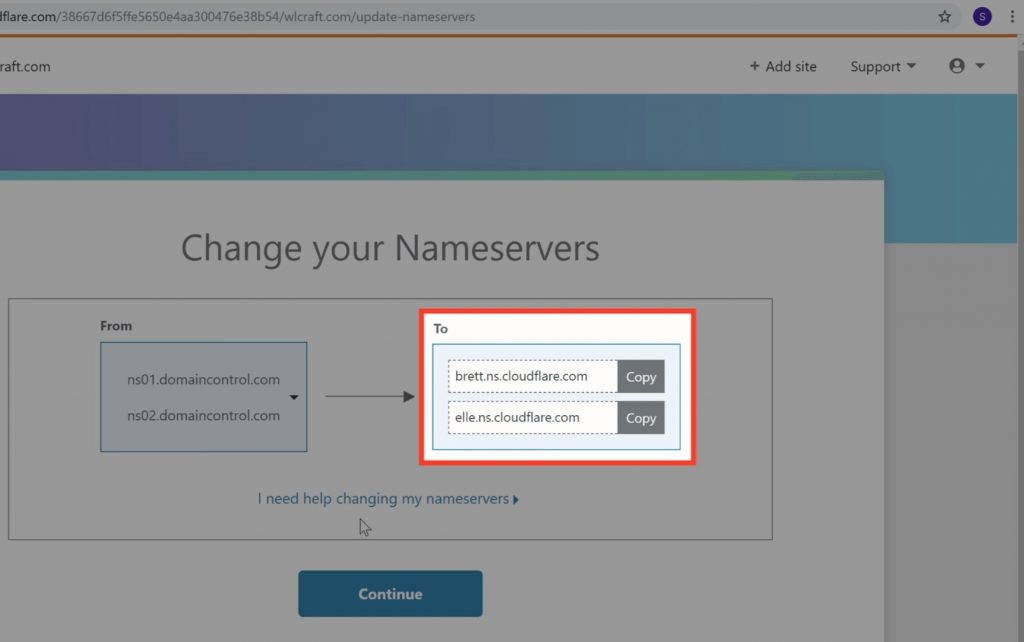
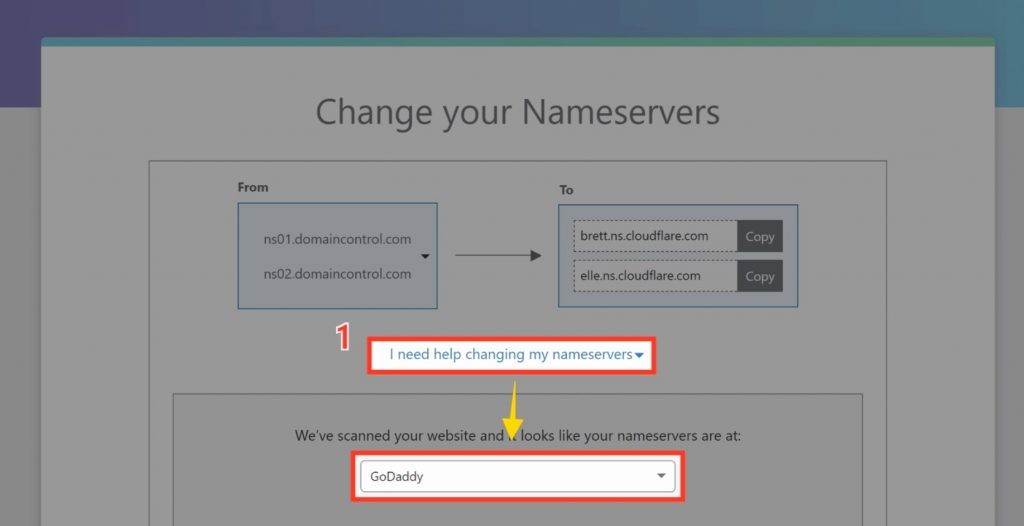
1. To find out your domain provider, just click ” I need help changing my nameservers ” you can see that, GoDaddy provides our domain.
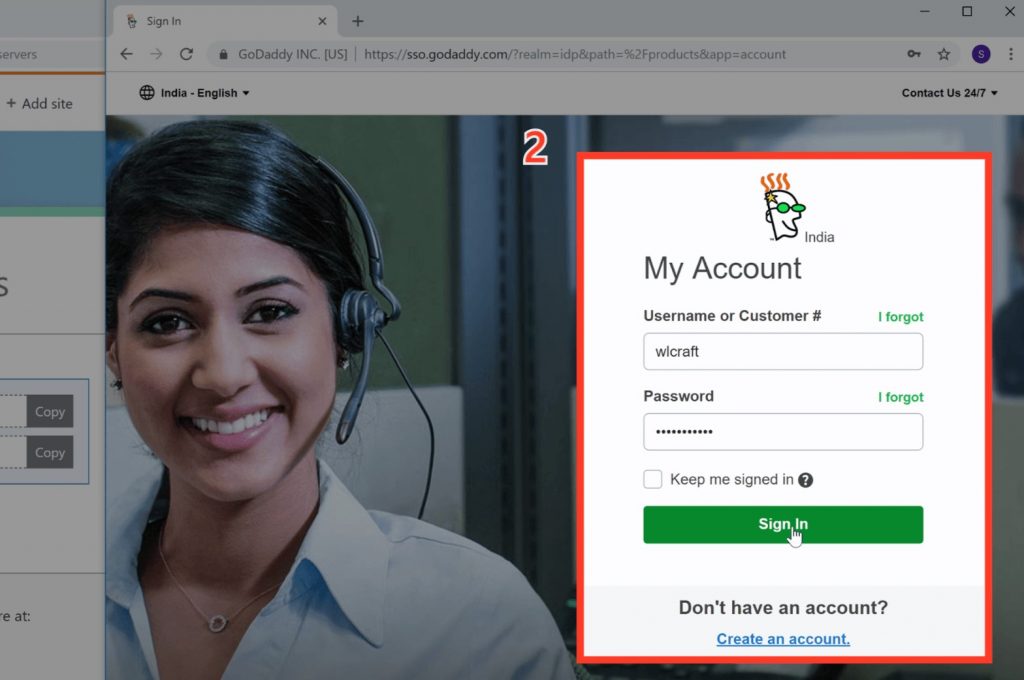
So to add the name servers, you need to login to GoDaddy. Now go to godaddy.com and
2. Sign in to your account.
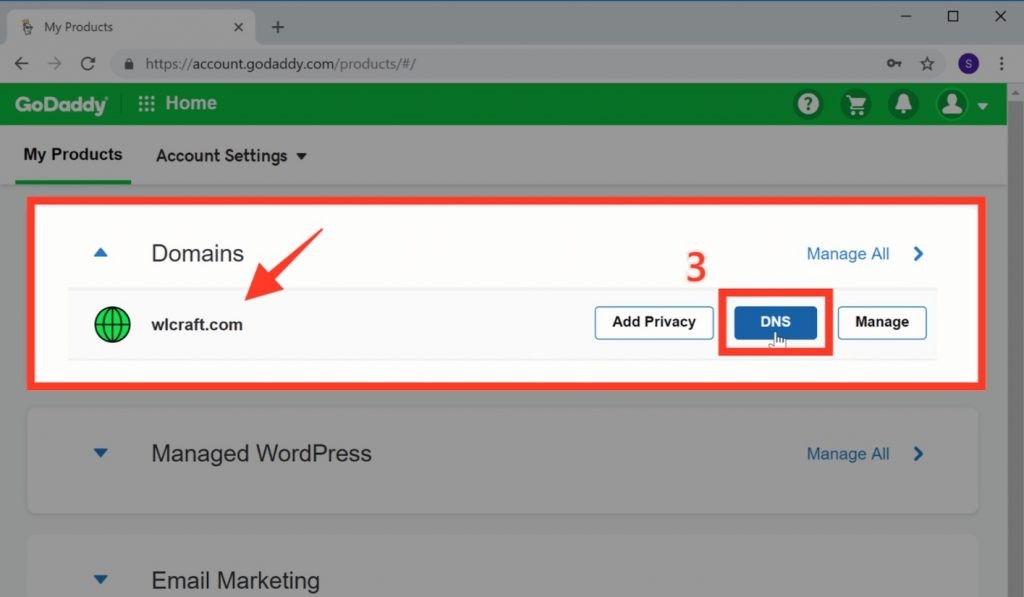
Once you have logged in to your GoDaddy account, you can see the domain which you have added to Cloudflare. Now to change the ‘nameservers’, of your domain,
3. Just click DNS.
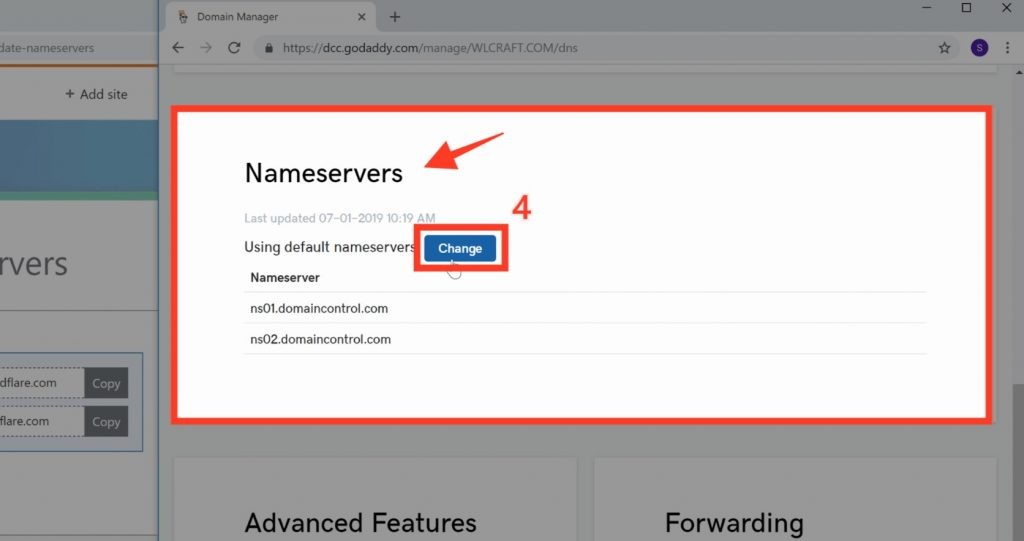
4. Now go to nameservers and click Change.
5. And then choose Custom from Choose your new nameserver type, once you have chosen the custom the nameservers fields appear, there you need to enter the details, which is provided in Cloudflare.

6. Now copy the details from the Cloudflare one by one and add it in the GoDaddy name server
7. And click Save.
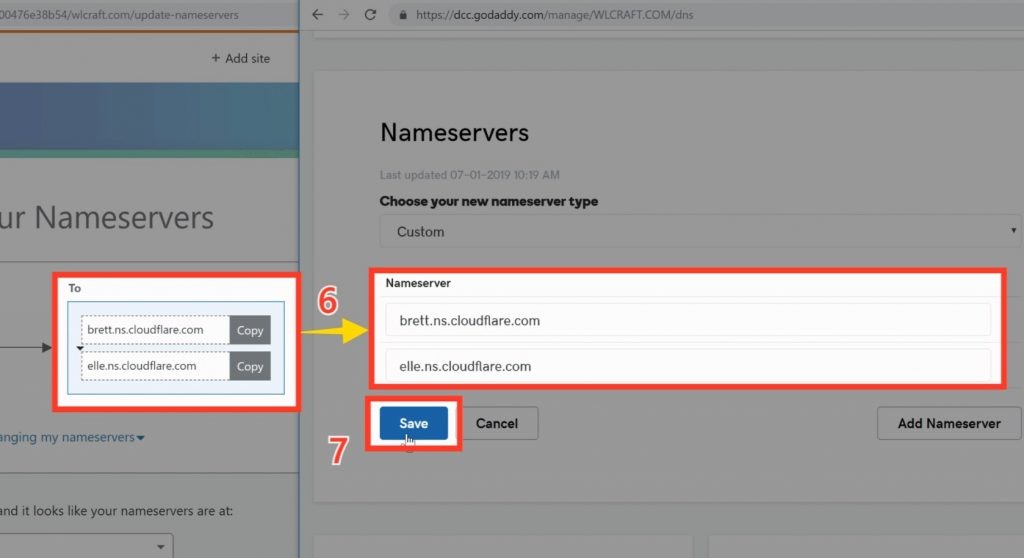
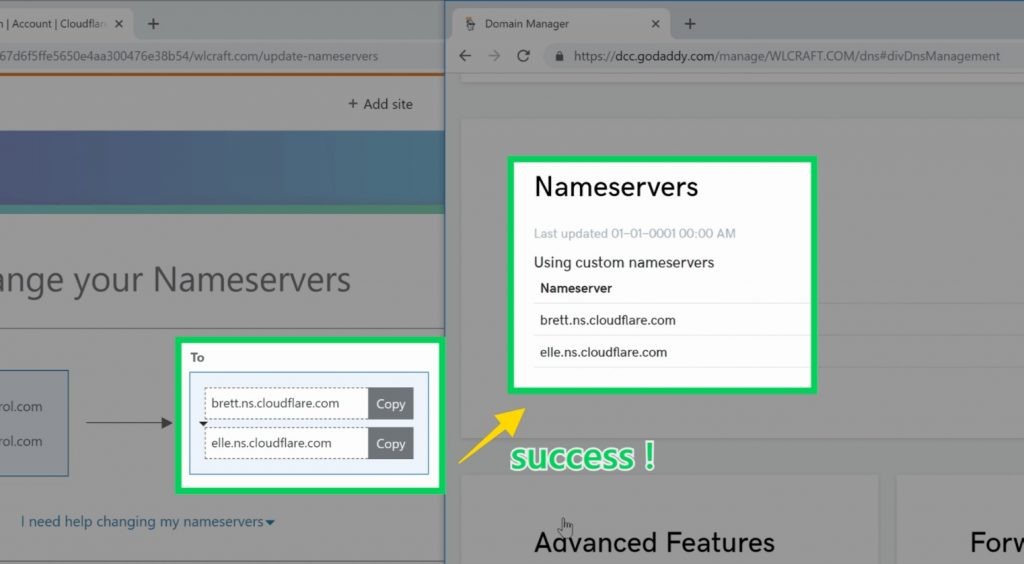
So now we have successfully added the nameservers to our domain.
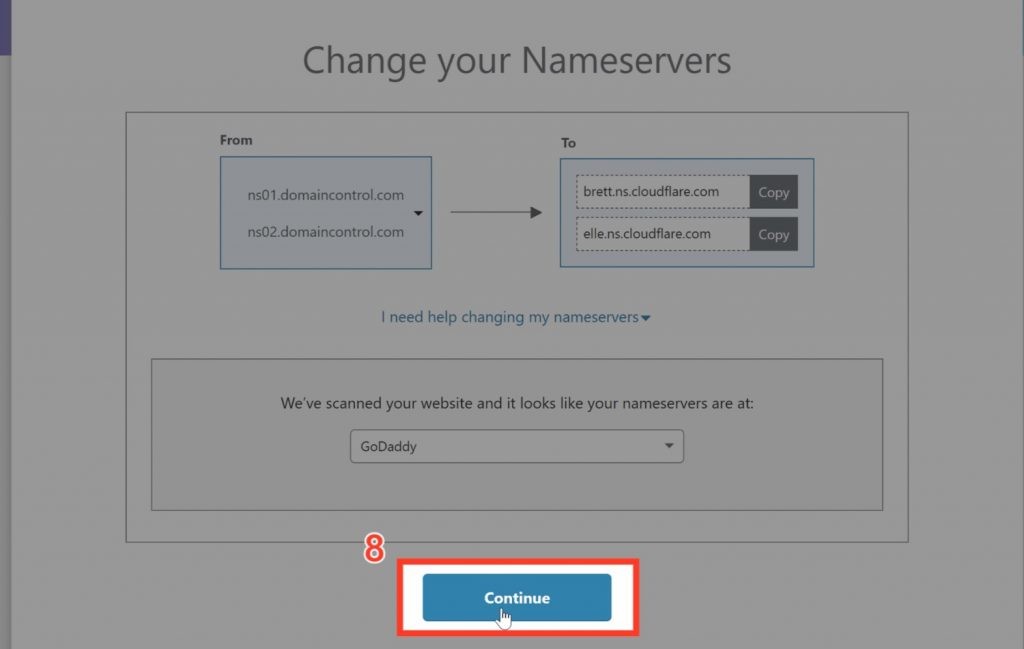
Now let’s go to Cloudflare and click Continue.
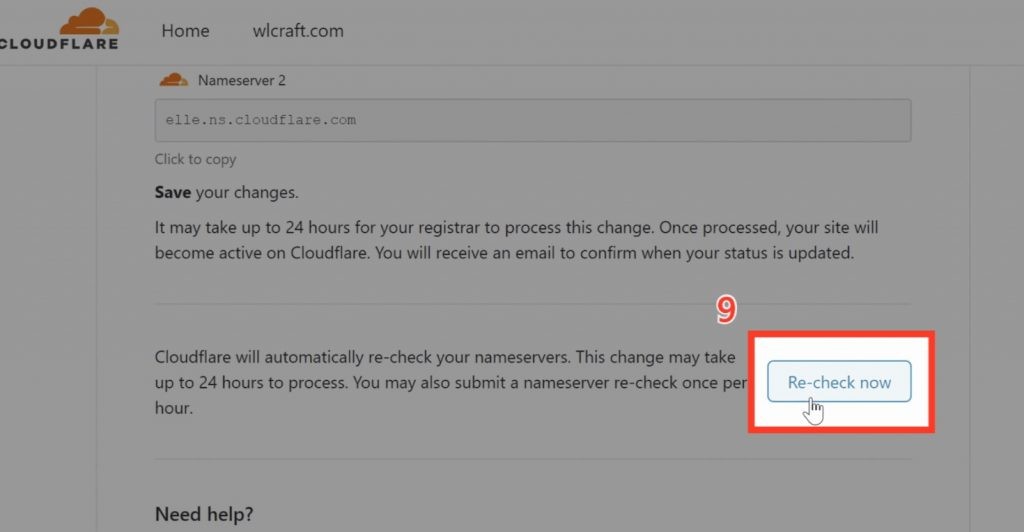
9. Now to check if the nameservers are changed just click Re-check now And you will get the message as shown in the image.
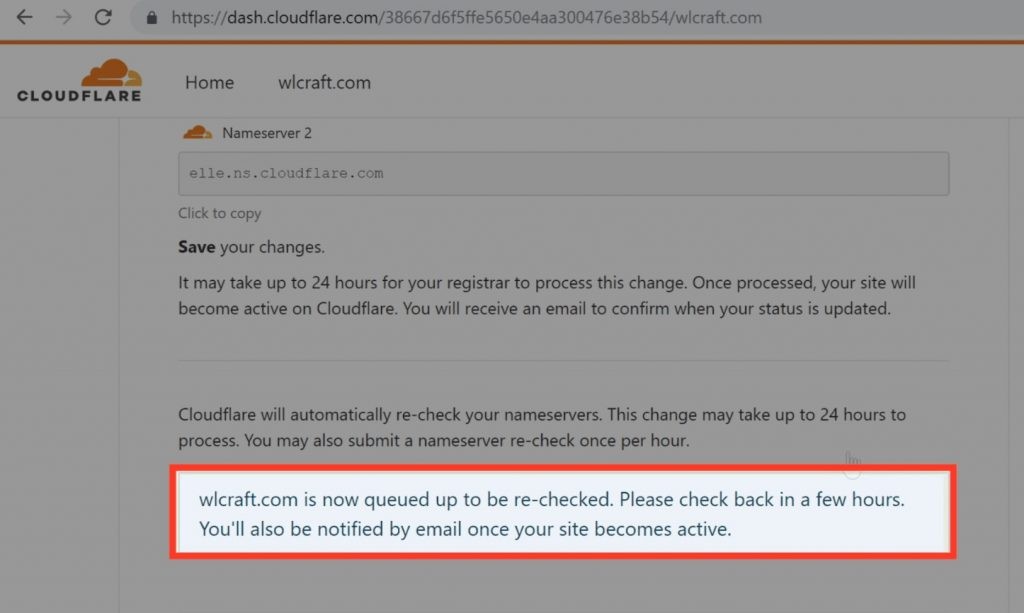
And now if you click refresh you should see this green icon as in the image which means your nameservers have been changed.
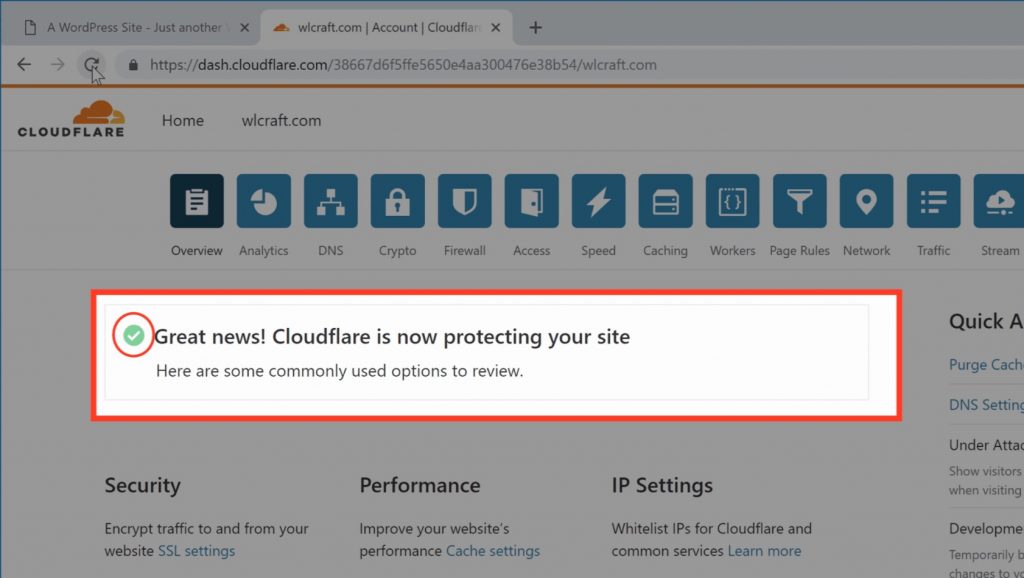
Now even if you don’t see this green icon immediately
You can still go to the next step and everything will work at the end of this tutorial.
STEP 4: Install the Cloudflare plugin in WordPress
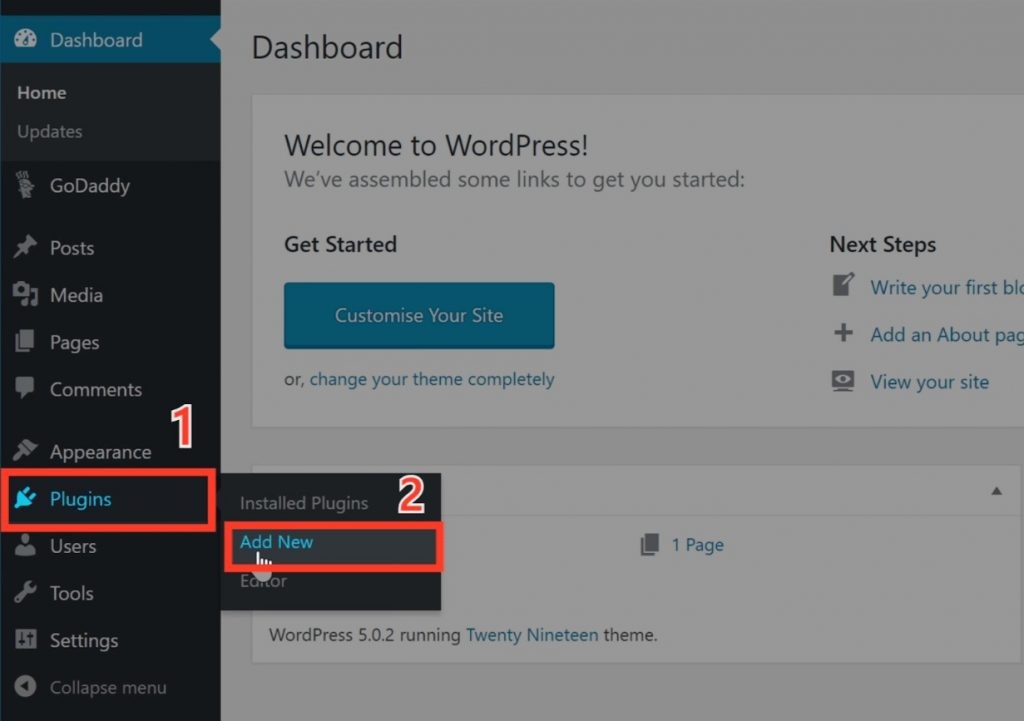
Now to install the plugin, go to your WordPress dashboard and
1. Go to Plugins and
2. Click Add new
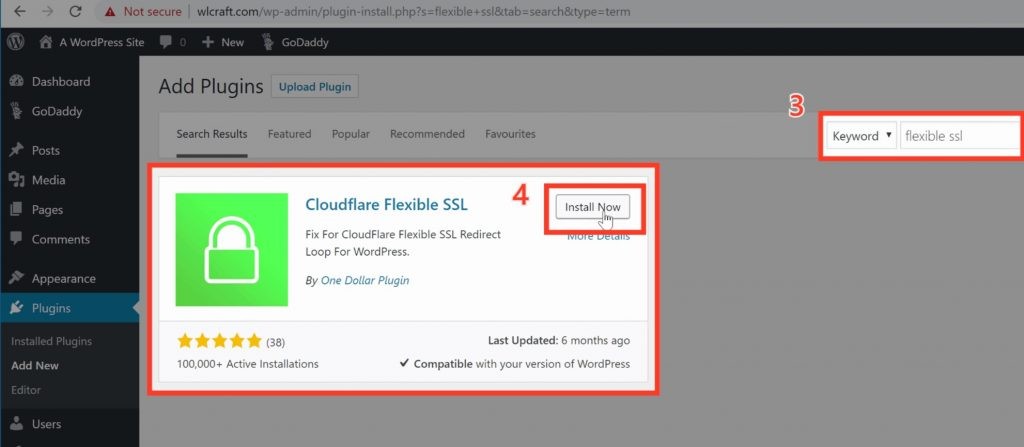
3. Now search for a plugin called Flexible SSL.
And you will get the Cloudflare Flexible SSL plugin,
This is the plugin which is going to help us to connect our site with Cloudflare and enable SSL on our website.
4. Now to install this plugin just click Install
5. And Activate,
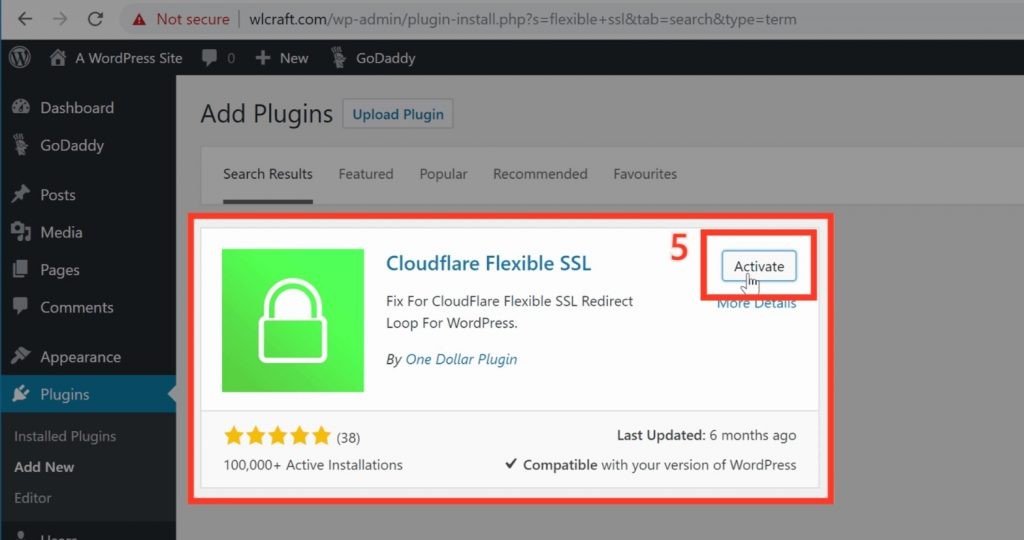
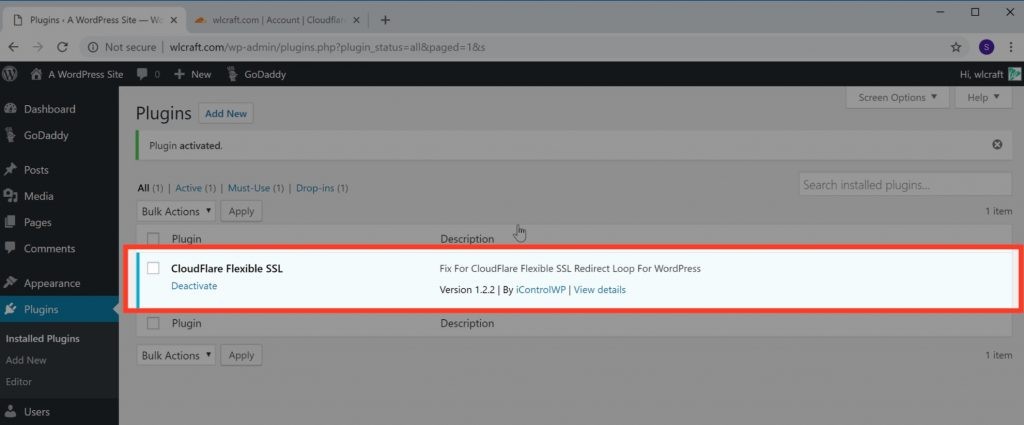
So now we have installed the Cloudflare plugin in WordPress
STEP 5: Enable SSL in Cloudflare
Now the final step is to enable SSL in Cloudflare.
So to do that, go back to Cloudflare,
1. Click the lock icon as shown in the image
2. And then click Edge Certificate
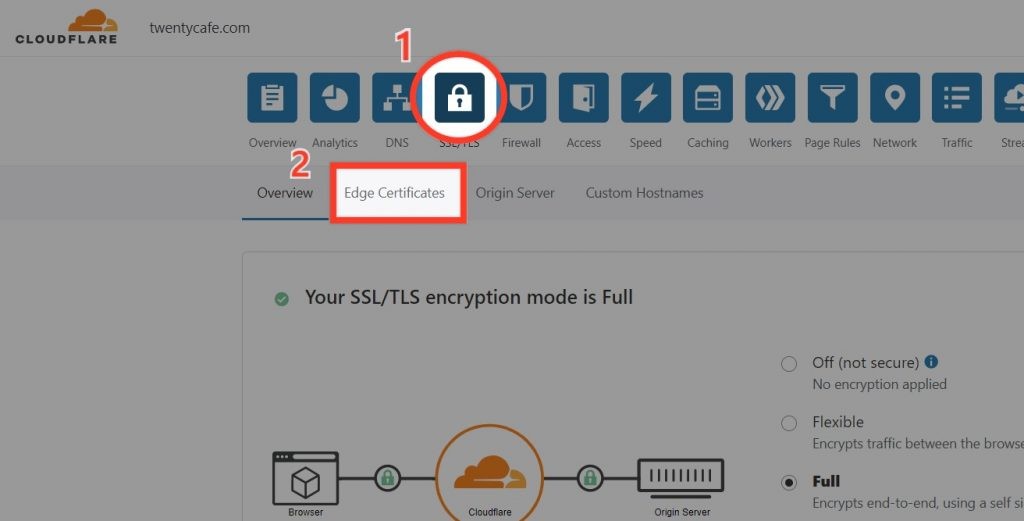
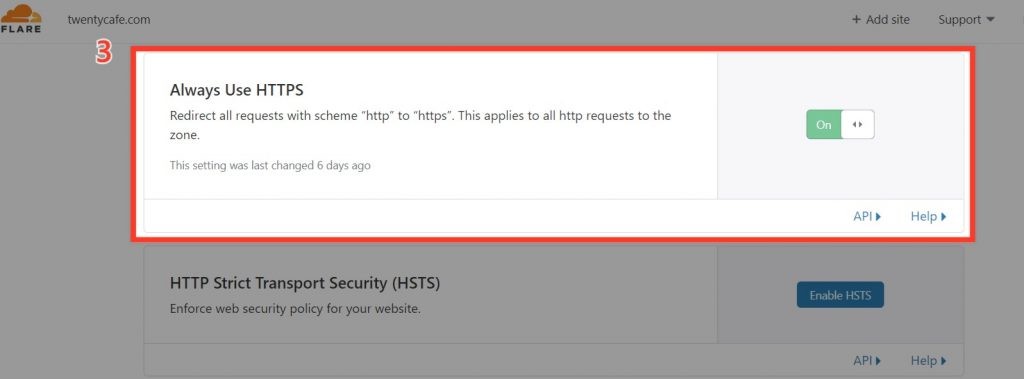
3. Now scroll down to ‘always use https’ And then turn it on. Now as soon as you turn this on, your website will now be secured with SSL
Now if you go to your site you can see that before we had this “Not secure” message.
Now if we click refresh, you can see that we now have the lock and the HTTPS, Which means we have now got the SSL
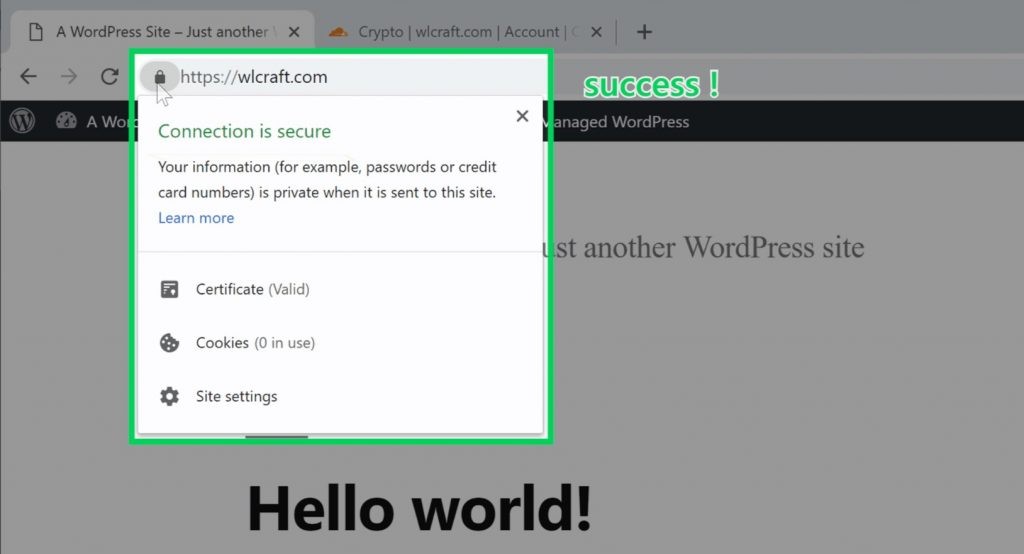
So now if you click the lock symbol you can see that our browser says the Connection is secure.
Now if your site didn’t load properly just wait for a few minutes and then load it from a different device, it will work after a few minutes.
I hope this article was useful to you to get a Free SSL certificate for your WordPress Website.
Read: 45 Ranking Signals To Be On Google Front Page In 2021
Please leave a comment to let us know if it worked for you.
Frequently Asked Questions:-
What is SSL used for?
SSL is used to secure the data that goes from the user’s browser to the website and vice versa. So when you have SSL on your site it ensures that the data between your website and your visitor is safe.
How can I get free SSL?
1.Create an account on cloudflare
2.Add your website to cloudflare
3.Change your nameservers
4.Install the cloudflare plugin in wordpress


